How many hours a day do you spend hunched over a desk, driving, or watching TV? Sitting for long periods of time has been linked to numerous health issues, but it also does something else. It severely compromises your core strength, causing low back pain, butt pain (raises hand), poor posture, and can even lead to injury while exercising. For older adults, these aches and pains can limit mobility which can snowball into other health issues.
Older adults need core strength. Building and maintaining core strength isn’t that hard. Read on to learn more about core strength, the benefits, and the simple exercises you can (and should) add to your current exercise regimen.
What is core strength
Core strength doesn’t equate to just “ab strength”. Your core is made up of several muscles which do include the 5 muscles that make up your abs but also include your low back, your butt, and your hip muscles. Some core exercises engage your quads and hamstrings which makes sense, after all, strong legs do help hold you up. But you can primarily think of your core as your “trunk”.
Why core strength is important
I kind of nailed that in the intro but let me expand a bit. Loss or lack of core strength will weaken and cause stiffness and cause discomfort in your low back and your butt. However, the impacts are more than just feeling achy. Lack of core strength can make it more difficult to do simple things like getting out of a chair, bending, lifting something off the ground, reaching overhead for something, and maintaining your balance. Read that again. These are all of the things that become harder for older adults to do over time.
And now, the exercises…
These exercises are also some of the best core exercises for older adults. They’re challenging yet easy to do anywhere. And the benefits are huge. Even if you don’t strength train, you should give them a try. And BTW – not one of them is a sit-up. You’re welcome.
Planks
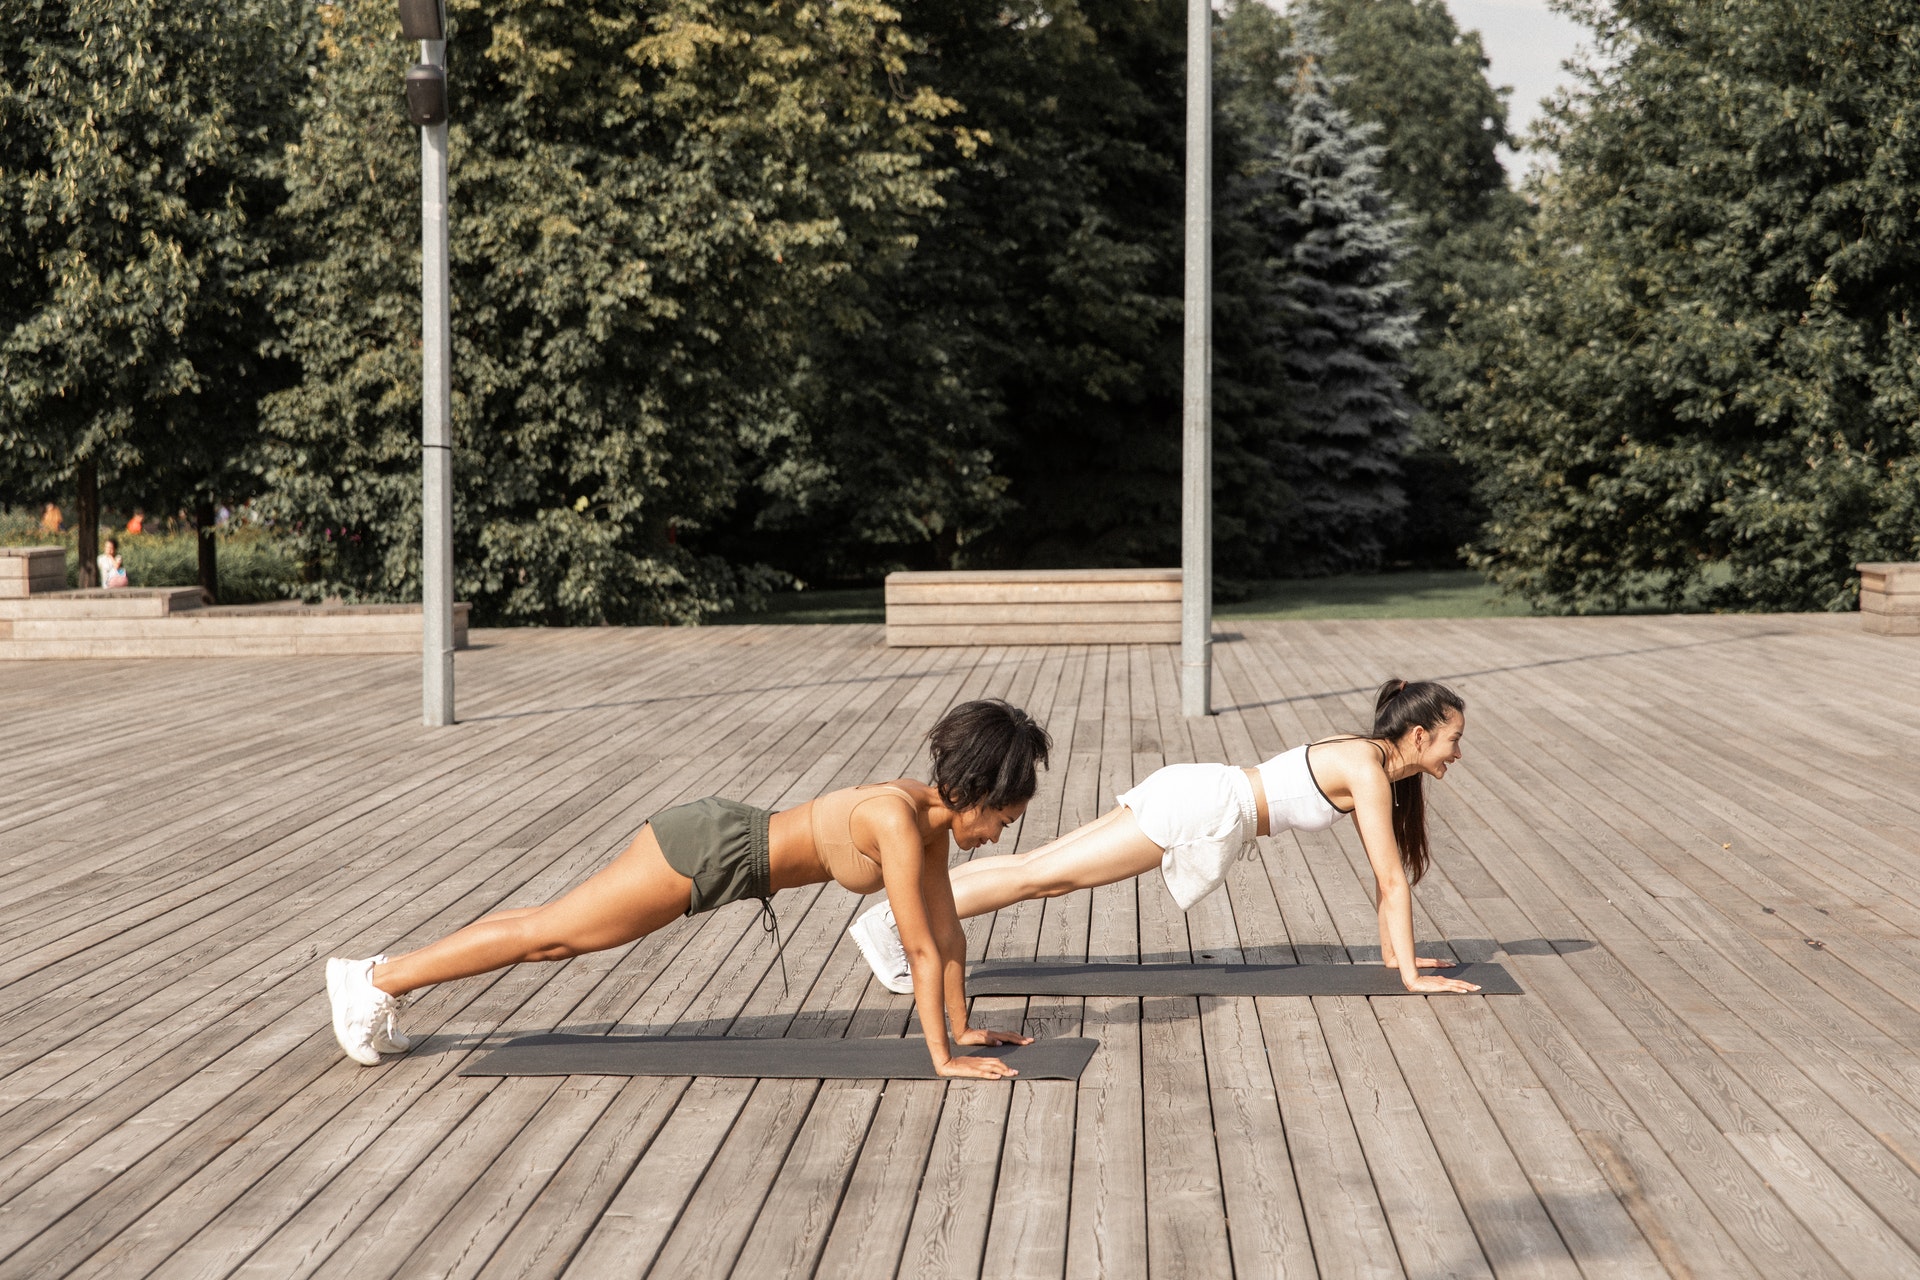
Planks are one of the quintessential core exercises. Even modified versions of plank exercises will target your abs, lower back, hip adductors, quads, hamstrings, and glutes. It’s truly a full-body exercise. You also don’t need to hold a 10-minute plank like Jennifer Anniston to reap the benefits. Shooting for a 10-30 second hold 3 times still yields results.
Regardless of which style you chose, it’s important to maintain good form to yield benefits and prevent injury. This means keeping a straight line in your back to keep your butt from sticking up. Well, how do you do that if you’re essentially face down? A good way to start is to “tuck your tail” which means tilting your pelvis forward, which will lower your hips.
To get an understanding of how this feels, try tucking your tail while standing up. To tuck your tail, contract your glutes (meaning squeeze your butt cheeks together). Your pelvis will shift forward. The same thing happens when you’re in a plank position. This movement drops the hips and prevents the butt in the air position that takes you out of a correctly aligned plank pose.
Modified: a plank is basically the top of a push-up. And just as you would modify a pushup to a bent knee version, you can do the same with a plank. If you’re new to trying planks or lack upper body strength, this is the way to go.
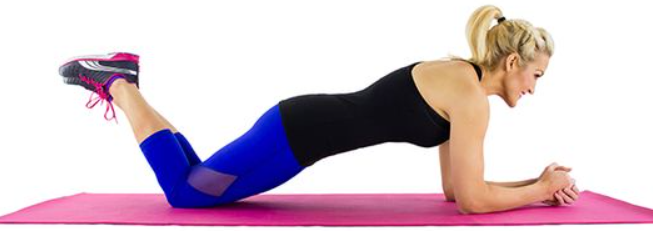
- Start by lying on your stomach, knees bent.
- Place your hands alongside your rib cage and push up so that your arms are straight.
- Your arms should be directly under your shoulders when you’re in plank position, so readjust if you need
- To maintain a neutral position in your neck, make sure you are gazing at a spot a few inches in front of you.
Straight: As mentioned above, a straight arm plank is the top of a push-up. Straight arm planks require more upper body strength, especially in your shoulders as you work to prevent your upper body from sagging down. If your wrists become sore in this position, try an elbow plank instead.
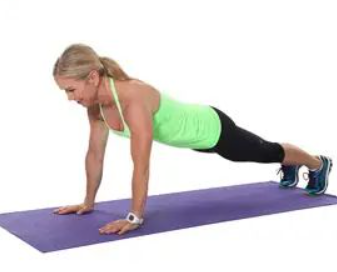
- Start by lying on your stomach, legs extended behind you about hip-distance apart. The tops of your feet should not be resting on the floor, rather your feet should be flexed so your toes are tucked
- Place your hands alongside your rib cage and push up so that your arms are straight. Push back into your heels to provide more stabilization.
- Your arms should be directly under your shoulders when you’re in plank position, so readjust if you need.
- To maintain a neutral position in your neck, make sure you are gazing at a spot a few inches in front of you.
- Lightly contract your thighs and abdominals to control the position. Tuck your tail by contracting your glutes to prevent your hips from a sticking up
- Don’t let your upper body sink between your straightened arms. Actively work to push away the floor.
- BREATHE through the exercise
Elbow: Elbow planks are a bit more challenging than straight arm planks because they force you to engage more of your core.
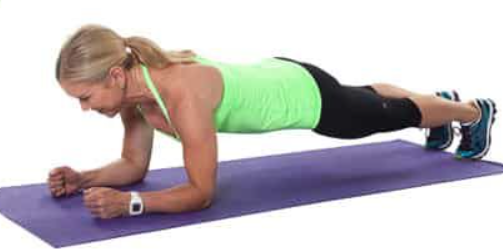
- Start in a straight arm plan position and lower your body onto your forearms, one at a time, elbows bent. As with straight arm planks, your arms should be positioned directly under your shoulders, your forearms stretched in front.
- To maintain a neutral position in your neck, make sure you are gazing at spot a few inches in front of you.
- Lightly contract your thighs and abdominals to control the position. Tuck your tail by contracting your glutes to prevent your hips from a sticking up
- Don’t let your upper body sink between your shoulders. Actively work to push away the floor by pressing down through your forearms
- BREATHE through the exercise
Superman
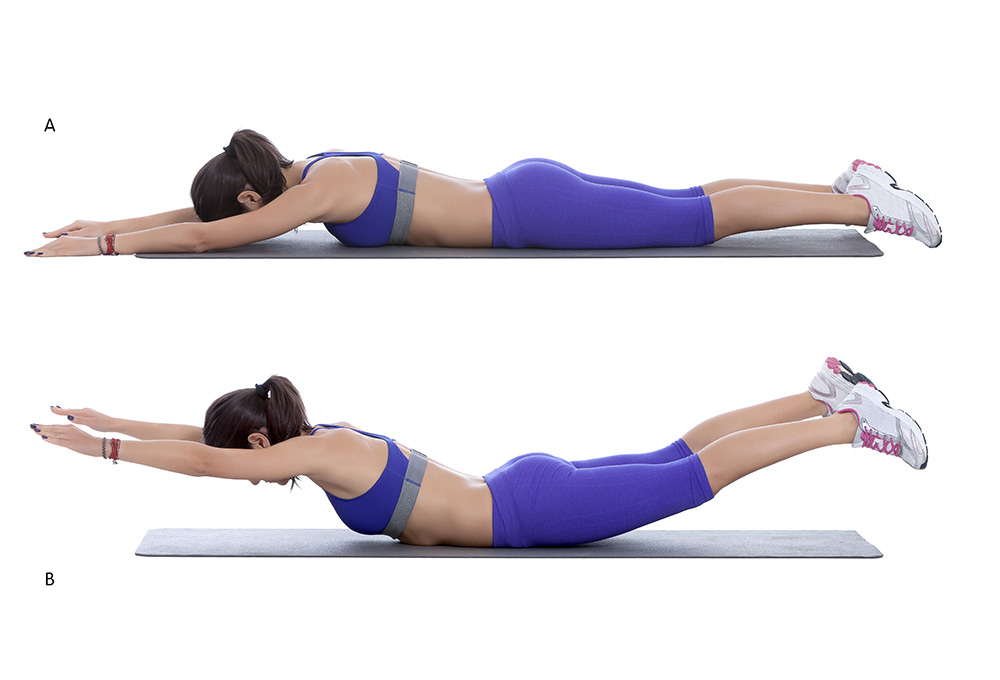
Like planks, you really get some bang for your buck with superman exercises. It’s a subtle movement so you might not feel like much is happening, but I assure you, there is. Despite how the cute model looks in the photo, you don’t have to lift this much to reap the benefits of this exercise. In fact, don’t even try. As you gain strength and flexibility in your core, you’ll be able to lift more of your upper body and legs off the ground and hold it longer. Start slow, take it slow, and the strength will come. Either way, you’re still gaining profound benefits. Perform 3 – 5 repetitions of this exercise.
- Start by lying on your stomach, arms extended straight ahead, legs fully extended behind, each about shoulder and hip distance apart, respectively
- Keep your head in a neutral position and aligned with your spine by keeping your gaze on the floor directly underneath you
- Lightly contract your abdomen and glutes, and simultaneously lifting both your arms and legs off the ground a few inches as if you’re flying like Superman. Make sure to keep your dead down and neck in alignment with your spine. Hold for 3 – 5 second then lower.
Bird dog
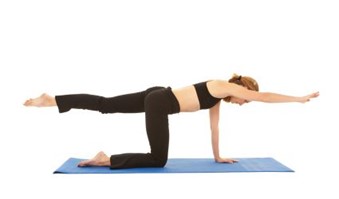
You’ll require a little bit of balance for this exercise. Like the superman exercise, you might not feel like you’re doing much, but this exercise engages several muscles in your arms, shoulders, abdomen, back, and legs. If your knees get sore, try placing a folded blanket underneath. Perform 5 – 8 reps of this exercise
- Start out on your hands and knees. Your hands should be under your shoulders and your knees hip distance apart, tops of your feet flat on the ground. If you need more stability in this position, flex your toes.
- Lightly contract your abdomen so your back stays flat. Keep your head in a neutral position and aligned with your spine by keeping your gaze on the floor directly underneath you
- Extend your right arm straight out in front of you while extending your left leg back straight behind you.
- Hold this position for 2 seconds then slowly lower your arm and leg.
- Repeat on the opposite side.
Bridge
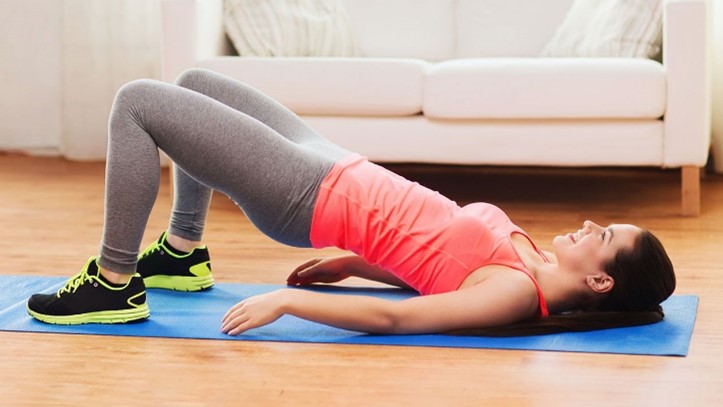
Bridges are another great core exercises that target your glute and abdominal muscles. Perform 3 – 5 reps of this exercise. As you gain strength, you can challenge yourself by increasing the time you hold the position at the top.
- Start by lying on your back, knees bent and about hip distance apart.
- Arms should be down by your sides, palms facing down.
- Lightly contract your abdomen so your back stays flat.
- Squeeze your glutes, push your heels into the floor and raise your hips. Don’t allow your knees to flair out; be sure to maintain the starting distance between them.
- Hold for 2 seconds and lower.
Side Bends
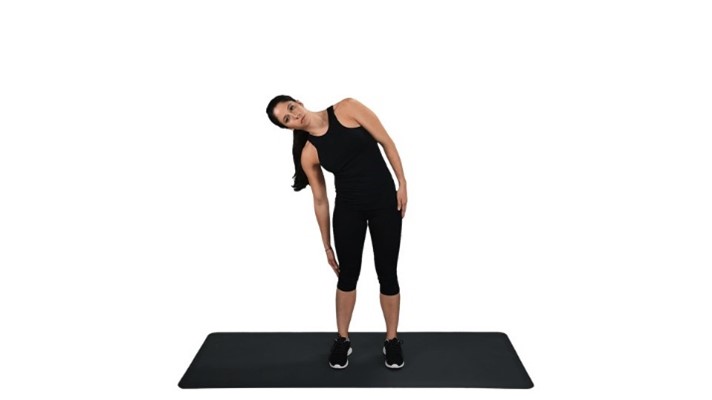
Side bends work your oblique exercise, which helps to stabilize your trunk and supports functions like reaching overhead. You can perform this exercise with or without dumbbells. The important thing to remember with this exercise is to keep your hips stable and only initiate the movement from your waist. Perform 5 – 10 reps on each side.
- Stand with feet a little wider than hip distance apart, arms hanging down by your sides.
- Lightly contract your abdominals and bend from the waist to your right.
- Engage your left oblique muscles to pull your torso back to center.
- Repeat on the opposite side
Frequency of core training
It’s not necessary to plunk yourself down on the ground every day and strengthen your core. Two to three days a week will do the trick. Will you get a six-pack overnight training this way? No. But that’s not the goal either. The goal is to strengthen your core to support everyday activities, combat the effects of sitting for long periods of time, and support functional movements. Besides, getting a six-pack takes more than exercise, but that’s an article for another time. I strength train three days a week and I start each session with three of these exercises, alternating on different days.
Final Words
The biggest thing to remember for these and any exercise – maintaining good form is key. Poor form can cause more injury and pain than the benefits you can derive from exercise. I’d rather you used less or no weight and performed fewer reps to maintain good form than anything else.
No matter what your exercise of choice, be sure to include core training in your program. There are several simple core exercises that don’t take a lot of time or space, yet the benefits are huge.
