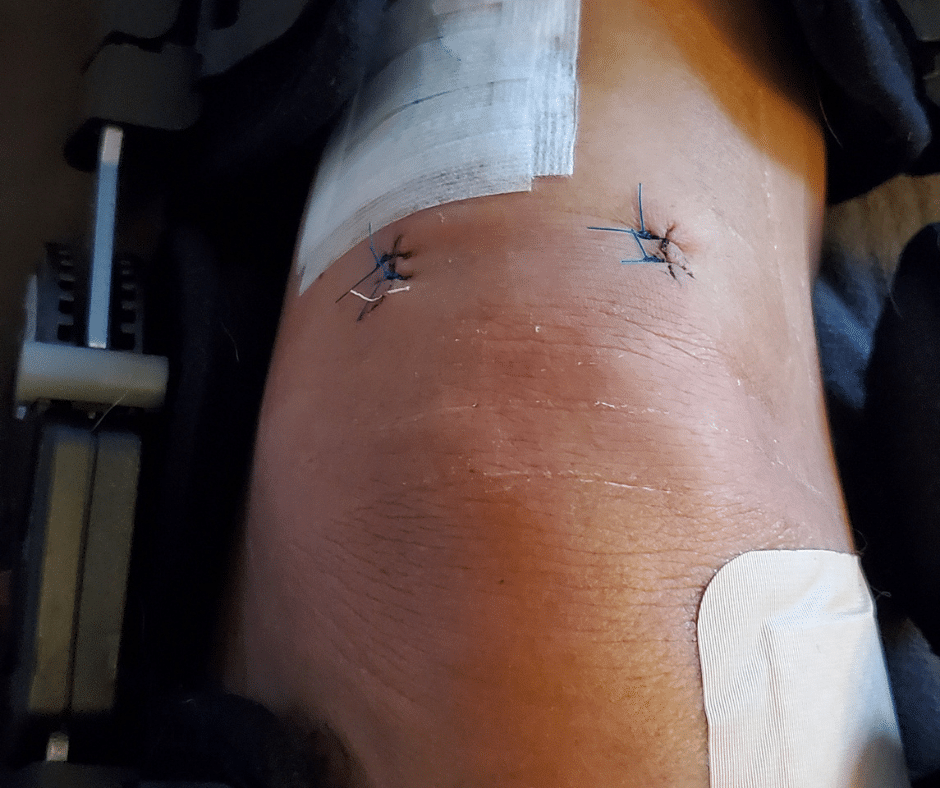
Tomorrow I enter my 4th post-op week of the surgery needed to repair my torn ACL and meniscus. This resulted from a hiking mishap back in October. I wanted to update you on the progress of my ACL recovery and some things I’m learning along the way.
My Freedom and My Crutch

My crutches were quite literally, my freedom and my crutch at the same time. During my ACL recovery, I needed them to get around, yet I couldn’t carry anything for obvious reasons. More than once I packed my breakfast or lunch in a shopping bag and carried it upstairs in my teeth to my office to eat at my desk while working. Sadly, this remains a bad habit I’ve not yet figured out how to break. Even getting my morning coffee from the counter to the table required multiple steps.
I am now down to one crutch. While at home, I’m walking without them completely. This came about quite unexpectedly. I figured out my repaired knee didn’t hurt when putting more weight on it. So, I weened myself down to one crutch. Upon realizing I could get along without a crutch at all, I put the other to the side.
I still use one crutch to go up and down the stairs, mostly for balance, and also in the middle of the night. The latter is because it takes a minute for my leg muscles to fire.
The Frankenstein Look
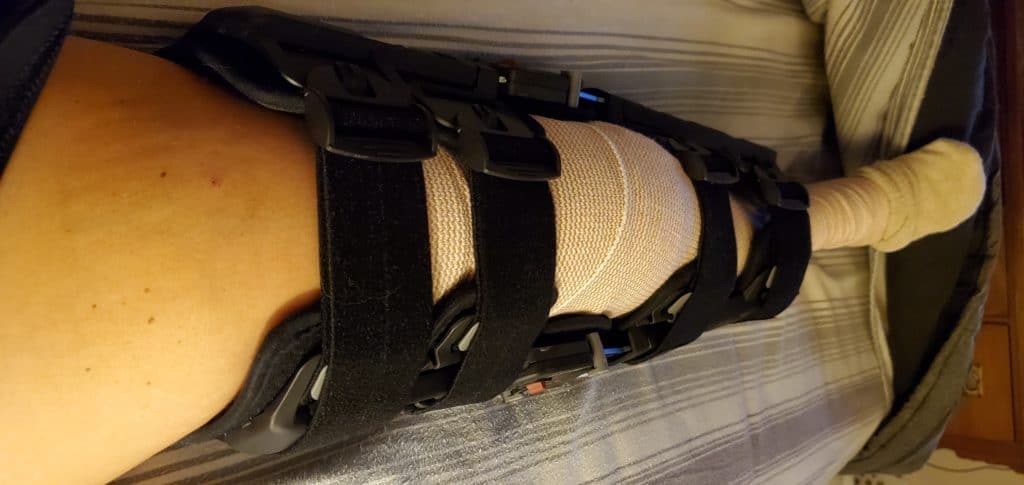
Still, my leg is encased in a brace and, when walking, has to be in its locked position. I now have a perpetual Frankenstein look when I walk. However, after a follow-up visit with my ortho’s PA, I can now unlock the brace when sitting and sleeping.
You can’t possibly imagine what a big deal this is, not only in terms of progress in my ACL recovery but also in being able to sit.
I went back to work, albeit at home, the week after my surgery. This meant sitting at my desk with a completely straight leg. I tried dozens of ways to get comfortable; resting my leg on a fit ball underneath my desk, sitting on the edge of my chair so my leg could be straight, sitting on the floor so my leg could be straight, standing for a bit so my leg could be straight. Every position I tried hurt something else; either my low back, shoulders, or neck. This left me cranky, irritated, and frankly, pissed.
Being able to unlock the brace when I sat made a tremendous difference in how I felt overall. I can sit in a chair and don’t have to reposition myself to get comfortable constantly. Plus, it enabled me to practice flexing and extended my leg while I work, a small but mighty ACL recovery exercise that will eventually help me walk normally. The only downside is that I have to remember to lock it before I stand up. And I have a big yellow post-it note to remind me to do so.
At Home ACL Recovery Exercises
I’ve had multiple orthopedic surgeries. With each one, the protocol is to get moving as soon as possible, which suites me fine because I’m super motivated to resume all of my old activities.
However, my enthusiasm is tempered by how simple physical therapy and ACL recovery exercises are. A majority of these exercises are intended to stretch my calf and hamstring and strengthen my quad muscles. Frankly, the elementary nature of them is – well – almost insulting.
Then I try them.
When I do, I’m reminded of the trauma the surgery inflicted on my leg. Starting at less than zero with the basics is what is necessary. They’re also about the only exercises I have the strength and capacity to do. Take that, ego!
Calf Stretching and Strengthening
Calf pumps (3 sets of 10): the only thing to do here is to bend and flex my ankle to stretch out my calf muscle. If I add a little squeeze at the end, it provides a little isometric strengthening.
It doesn’t seem like a big deal, right? It is. My leg is a little redder, and almost purple, compared to my left, and cold to the touch. That’s a result of the trauma and lack of movement, making my ankle stiff to where these movements become tiresome.
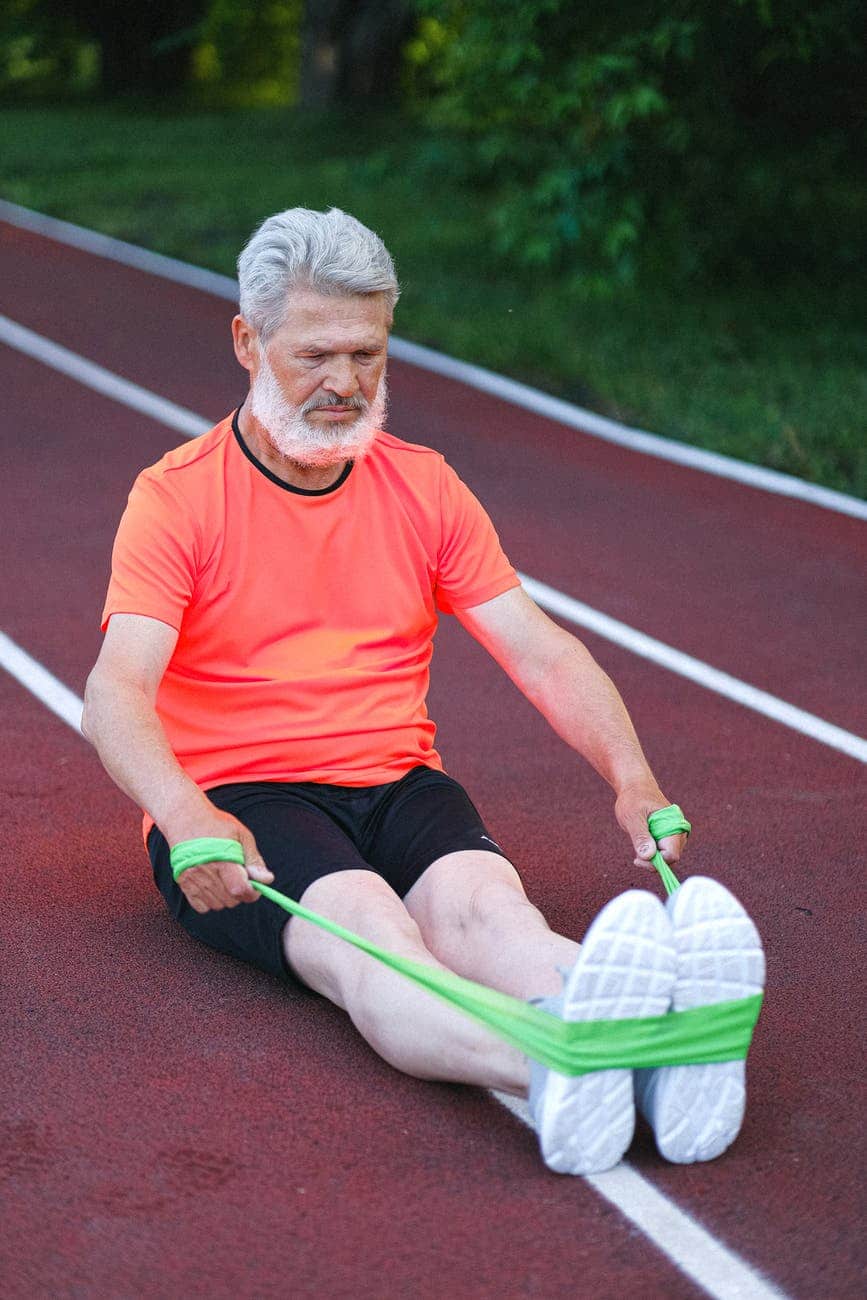
Calf stretch (3 sets of 10, 20-sec hold): after the calf pumps, a little more stretching on the calf muscle is needed to release the knee’s tension. For these, I use a yoga strap to loop around my foot and pull and hold for 20 seconds. This isn’t anything different than what I do in yoga. Now I’m saddened at my weak and withered calf muscle. I do these exercises before the quad tightening since it breaks through some of the knee’s stiffness.
Quad Stretching and Strengthening
Quad tightening (3 sets of 10, 10-second hold): try this one yourself. Sit with your legs straight out in front of you, then tighten your quad muscle. When you do that, your knee hyperextends, and your heal should come off the ground.
Now imagine having no quad muscle left to contract – at all. This exercise takes a lot of mental effort. I have to really concentrate on contracting a quad muscle that doesn’t want to fire and push through the discomfort of a knee that doesn’t want to hyperextend. Natural knee hyperextension is 10 degrees. I’m off by about 4 degrees and have to work this one daily.
Leg lift (3 sets of 10): this exercise combines quad tightening with lifting the leg. Lying on my back with my left leg bent, I attempt to tighten my right quad, hyperextend my knee, and use that same muscle to lift the leg to about 45 degrees. Again, this one takes mental effort. If I’m not focusing on keeping my quad tight throughout, the efforts transfer to my hip flexors.
Hamstring Stretching
Heel slides (3 sets of 20) are done in a prone position with a yoga strap wrapped around my toes and my heel resting on a towel. I slowly pull my heel in, then release it back down.
Knee Mobility
Continuous Passive Motion (CPM) machine: I’m supposed to be on this machine 3 times a day for 2 hours. I’m lucky if I get on it for 1 hour if that. Since I’ve progressed to 90 degrees flexion on the CPM, I can send it back. I’ve yet to do that. Getting on the CPM at least once a day, even if it’s just for 30-45 minutes, gets that first hard bend into my knee, kind of like an ice breaker. Once I get through that, the stiffness clears quickly, and I’m good to go.
Except for the CPM machine, I do all the same exercises with my Physical Therapist two times a week. In place of the CPM machine, however, we are doing heel slides, which for some reason hurt much more than the CPM machine.
Hamstring stretch (3 sets of 10, 20-sec hold): again, this harkens back to years of yoga and the simplicity of the seated forward fold I once knew. Using a yoga strap, I lay on my back, extend my leg, and gently let the hamstring stretch out, applying a little pressure to the yoga strap to deepen the stretch
PT Stands for Persistent Torture
Several young kids staff the PT center I visit. Well educated PT, DPT, or Physical Therapists, Doctorates of Physical Therapy, but young. When asked by one of them if I knew what PT stood for, I quipped, “Persistent Torture.” He remarked that was the best answer he’s ever heard.
I do not doubt that they look at someone my age and make assumptions about my capabilities, motivation, and determination. I say that because I can tell you they all underestimate me. My focus is on playing full out and getting the best results out of the time that I’m there.
They figured that out when they put me on the BFR or Blood Flow Restriction therapy machine for the first time.
Introducing Blood Flow Restriction
I’d seen “BFR, if available” written on the PT script by my doctor but didn’t know what it meant. It turns out it’s a big deal when it comes to helping improve muscle strength, especially as part of a PT protocol.
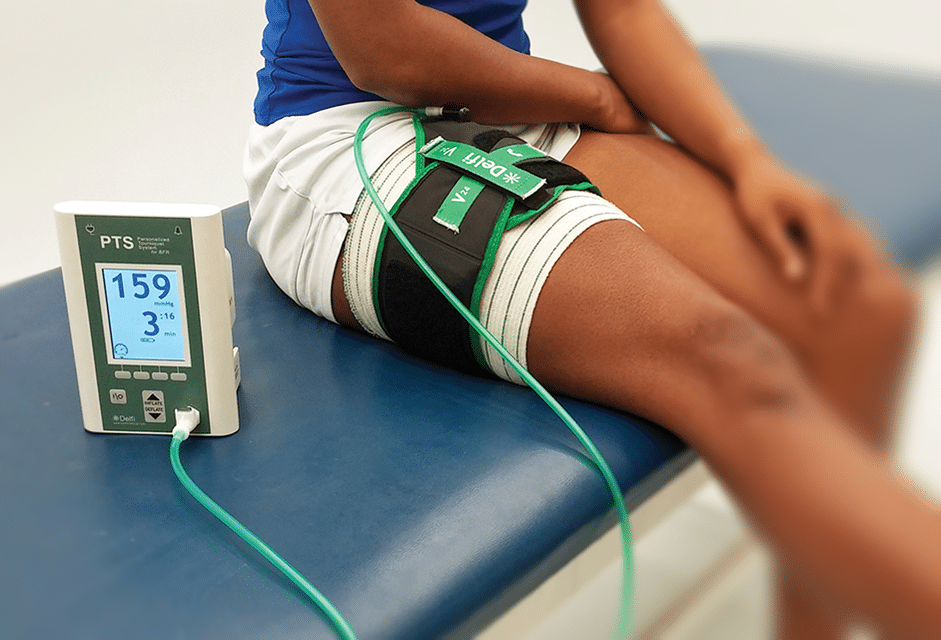
Basically, BFR safely constricts blood flow to an affected area. When combined with low load exercises, like a leg lift, it quickly promotes muscle growth and concentrates the blood around the muscle.
In practice, it’s really like taking a giant blood pressure cuff, wrapping it around your thigh, and filling it with air until it starts to restrict blood flow. Then they make you perform an exercise, or several, under this constriction.
We’d be using the BFR to complete the leg lift exercise. As I mentioned before, this ACL recovery exercise was hard enough already to focus on contracting that quad muscle. Now they just went and constricted the blood flow.
This 4-set exercise (1 set of 10, then 3 sets of 20), has a timed 30-second rest in between sets. Unlike the others, they had someone monitor me to either shut the machine off or make sure I didn’t break down in tears.
I was cursing in my head after the 2nd set. One said, “if it gets too hard, we’ll just stop, and you can do the quad tightening,” while another said, “don’t let your ego get you.” Tsk tsk tsk. What they didn’t know is that only spurred me on.
I almost quit halfway through the next to the last set. Then I almost bailed on the last set. My leg was screaming, almost burning. “Fuck that,” I said to myself as I pumped out the last 5 reps on the last set.
I impressed the kids and the other patients who’d been through the same torture. At that moment, they all learned of my determination and my work ethic.
TGIF – Thank God I’m Flexible
There is no doubt in my mind that being genetically flexible and years of yoga is an instrumental factor my recovery.
I can lower myself to the ground and get up with no issue at all. With a leg that needs to remain straight in a locked brace, I’m still able to get on my shoes and socks because I can bend that far forward to do so.
My ability to balance myself, also as a result of years of yoga, is also significant and paying off in spades. As my leg gets stronger, testing that balance is a new PT activity and one where I’m making tremendous progress.
This is the latest exercise introduced into my PT routine, and again, its simplicity is annoying but necessary.
For this, I stand heel to toe. Meaning with my right leg straight, I stand with the heel of my left foot, touching the toe of my right foot, and balance myself for 10 seconds, then switch sides. Because this went so well on the first go-around, we’ll progress to standing on a cushioned surface to force my muscles to work a little harder to balance.
Little Wins
Going into this, I knew the ACL recovery timeline was going to be a long one. During this time, I’m learning that little wins make a big difference.
I left the surgical center in a cumbersome and uncomfortable leg brace and crutches on which to maneuver. Now I’m thrilled to be down to one crutch and be able to sit with a bent knee. Those are little wins.
It’s the little wins that I have to focus on because, in the long run, they add up to big results. It’s the same thing I’ve been telling all of you. Little changes add up to big results in the long run. Whether it’s for losing weight, building muscle, or getting some mobility, slow and steady wins the race.
My calf and quad muscle look pitiful right now, but they won’t for long. I know that. I can either torture myself by dwelling on what it looks like now or sit back and play the long game, knowing that every ounce of effort I put in will yield the big results in the long run.